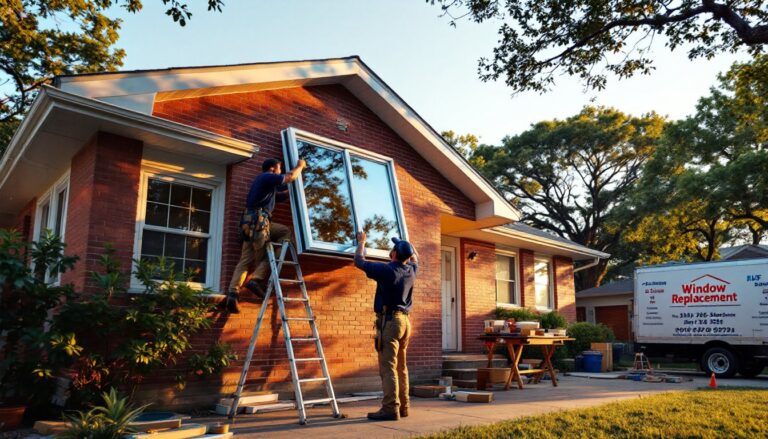
Viking refrigerators are built like tanks, precision-engineered, commercial-grade appliances designed for decades of use. But even the toughest machines need parts replaced eventually. Whether it’s a failing ice maker, a torn door gasket, or a clogged water filter, knowing how to identify, source, and swap out Viking components can save hundreds in service calls and keep your fridge running at peak performance. This guide walks through the most common Viking refrigerator parts that fail, where to find genuine replacements, and when you can tackle the repair yourself versus calling in a certified tech.
Table of Contents
ToggleKey Takeaways
- Common Viking refrigerator parts like water filters, ice makers, and door gaskets are often replaceable by homeowners, potentially saving $150–$300 per service call.
- Water filters need replacement every six months, and ice maker water inlet valves ($80–$150) are the second most frequent failure point in Viking refrigerators.
- Always use OEM (original equipment manufacturer) parts from Viking’s official portal or authorized dealers to maintain warranty coverage and ensure proper compatibility.
- Door gasket replacement is a simple DIY project requiring only a Phillips screwdriver—remove the old seal, clean the mounting surface, and install the new gasket at room temperature for proper sealing.
- Locate your model and serial number on the metal data plate inside the fridge compartment before ordering Viking refrigerator parts to ensure you receive the exact component revision.
- Leave compressor repairs, control board diagnostics, and high-voltage electrical work to certified technicians, as these jobs require EPA certification or specialized diagnostic equipment.
Why Knowing Your Viking Refrigerator Parts Matters for Homeowners
Viking appliances sit at the high end of the market, both in performance and in price. A service call alone can run $150–$300 before parts and labor, and some dealers charge premium rates for diagnostics on luxury brands. Understanding which components are user-replaceable versus tech-only can cut costs dramatically.
Many homeowners assume all Viking repairs require a certified technician, but that’s not always the case. Water filters, light bulbs, gaskets, and some ice maker modules are designed for owner replacement. Viking’s build quality actually makes DIY work easier in some ways, parts fit precisely, fasteners are standard hardware, and service manuals are detailed.
Knowing your parts also speeds up repair timelines. If you can identify the exact component before calling for service, you can order it in advance or confirm the tech will arrive with the right piece. For out-of-warranty units, this control over parts sourcing can mean the difference between a $400 repair and a $1,200 one.
Finally, keeping certain consumables (filters, gaskets, light bulbs) on hand prevents minor issues from escalating. A torn gasket that goes unnoticed can spike energy bills by 10–15% and overwork the compressor, leading to premature failure of a part that costs over $600 to replace.
Most Common Viking Refrigerator Parts That Need Replacement
Water Filters and Ice Makers
Water filters are the most frequently replaced Viking component, and for good reason. Viking recommends changing filters every six months, though households with hard water or heavy ice/water use may need quarterly swaps. The part number is model-specific, Viking uses several filter designs, including twist-lock cartridges and slide-in units. Using off-brand filters can void warranty coverage on water system components, so stick with OEM (original equipment manufacturer) parts when possible.
Ice makers are the second most common failure point. Viking ice maker assemblies include the motor module, water inlet valve, fill cup, and bin thermostat. When ice production slows or stops, the problem often starts with the water inlet valve (part numbers vary, but expect $80–$150 for the valve itself). If the motor or module control board fails, replacement is straightforward but pricey, assemblies run $250–$500 depending on the model.
One heads-up: many Viking models use a raker bar (the sweeper arm that pushes ice forward) made of plastic that can crack over time. It’s a $30 part but requires disassembly of the ice bin to access. Wear work gloves, the raker bar sits in the freezer compartment, and metal edges can be sharp.
Door Seals and Gaskets
Door gaskets (also called door seals) keep cold air in and warm air out. Viking gaskets are magnetic, premium-grade vinyl that should last 8–12 years under normal use. You’ll know it’s time for replacement when you feel cold air leaking around the door perimeter, notice frost buildup inside the fridge, or see visible cracks and tears in the gasket material.
Replacement gaskets are model- and door-specific, French door units have separate gaskets for each door, and some models have a center mullion gasket as well. Prices range from $90 to $200 per gasket. Installation is DIY-friendly: most Viking gaskets are held in place by a retainer strip with Phillips-head screws every few inches. Remove the old gasket, clean the mounting surface thoroughly (grease and grime prevent proper adhesion), and secure the new one.
Let the new gasket acclimate to room temperature for at least two hours before installation. Cold gaskets won’t seat properly and can tear during fitting. After installing, check the seal by closing the door on a dollar bill, if you can pull it out easily, the gasket isn’t sealing correctly. You may need to adjust door alignment or tighten hinge bolts.
Where to Source Authentic Viking Refrigerator Parts
Start with Viking’s official parts portal or authorized service centers. Viking is now part of Middleby Residential, and their parts infrastructure is robust. You can order directly from their website with your model and serial number, or call their customer service line. Shipping is typically 3–5 business days, though some parts ship from regional warehouses and arrive sooner.
Authorized Viking dealers and appliance parts distributors (like AppliancePartsPros, PartSelect, and RepairClinic) stock common components and can expedite shipping. These third-party vendors often have better search tools and cross-reference databases, making it easier to find the right part if you’re uncertain. Verify that the seller is listed as an authorized Viking parts dealer to avoid counterfeit or gray-market components.
For out-of-production models or rare parts, check with appliance salvage yards or specialty vintage appliance parts suppliers. Viking has been manufacturing refrigerators since the 1980s, and older units sometimes require discontinued parts. Be prepared to pay a premium for obsolete components.
Avoid generic “universal fit” parts for critical systems like thermostats, control boards, and compressors. Viking engineers these components to tight tolerances, and off-brand substitutes can cause poor performance or void remaining warranty coverage. For consumables like water filters, some tested recommendations suggest that certified aftermarket filters perform adequately, but OEM filters guarantee compatibility.
If you’re dealing with a complex repair and need multiple parts, consider contacting a certified Viking technician for a parts list before ordering. Techs have access to service bulletins and engineering diagrams that can pinpoint the root cause faster than trial-and-error replacement.
How to Identify the Right Part for Your Viking Model
Every Viking refrigerator has a model number and serial number stamped on a metal data plate. The plate is usually located inside the fridge compartment, check the upper-left or upper-right sidewall near the top. On some models, it’s on the interior ceiling or behind the crisper drawer. Write down both numbers before you start searching for parts.
The model number tells you the product line, size, and configuration (e.g., VCSB483, DFBB660, RVRF336). The serial number encodes the manufacturing date and helps identify running changes, Viking sometimes updates components mid-production without changing the model number. When ordering parts, provide both numbers to ensure you get the exact component revision.
If you can’t locate the data plate or it’s worn off (common on units older than 15 years), take clear photos of the part you need to replace. Capture any markings, part numbers, or connectors. Most online parts suppliers have chat support or email help desks where you can upload photos for identification.
For electronic components like control boards or thermostats, the part number is often printed directly on the component. You may need to remove the part to see it, always disconnect power before pulling any electrical component. Snap a photo of wire harness connections before disconnecting anything, so you can reconnect correctly.
Cross-referencing is your friend. Sites like HomeAdvisor and appliance repair forums have databases where users have documented part numbers for common repairs. Some Viking models share components across product lines, so a part for a 48-inch built-in may also fit a 42-inch unit if the configuration is similar.
DIY Replacement Tips: When to Tackle It Yourself vs. Calling a Pro
Safe DIY Projects:
- Water filters: Twist or slide out the old cartridge, insert the new one. No tools required. Run water through the dispenser for 3–5 minutes to flush carbon fines.
- Door gaskets: Remove screws, peel off old gasket, clean surface, install new gasket. Phillips screwdriver and household cleaner are the only tools you need.
- Light bulbs: Viking uses appliance-rated bulbs (usually 40W max). Always disconnect power before replacing to avoid shock.
- Shelf and bin replacements: These are cosmetic parts. Order by model number and snap into place.
- Ice maker water inlet valves: Shut off the water supply line at the wall, disconnect the old valve (typically two screws and a wire harness), install the new one. Requires an adjustable wrench and needle-nose pliers.
When to Call a Pro:
- Compressor or sealed system repairs: If refrigerant is involved, you’re legally required to hire an EPA-certified technician. Compressor replacement is a $900–$1,500 job and not DIY-friendly.
- Control board diagnostics: If the fridge is throwing error codes or behaving erratically, a tech with diagnostic software can pinpoint the issue faster than parts-swapping guesswork.
- French door hinge or mullion adjustments: Viking French door models use complex hinge assemblies and center mullions that require precise alignment. Misalignment causes gasket leaks and uneven cooling.
- Any repair involving high-voltage wiring or capacitors: These components store electricity even when the unit is unplugged. Wear insulated gloves and use a multimeter to confirm zero voltage, or call a tech.
Always consult Viking’s service manual for your model before starting a repair, many are available as PDFs on the Viking website or through appliance repair forums. Manuals include wiring diagrams, part callouts, and torque specs for fasteners.
For complex projects like replacing an evaporator fan motor or defrost heater, consider the cost-benefit. If parts run $200 and a service call is $300 including labor, the DIY savings may not justify the risk of damaging adjacent components during disassembly. Appliance work in tight spaces often requires a second pair of hands to hold panels or guide components into place.
Finally, never bypass safety switches or thermostats to “test” a repair. Viking refrigerators use multiple interlocks and thermal cutoffs to prevent fires and compressor damage. If a part seems faulty, replace it, don’t jury-rig a workaround.
When in doubt, resources from kitchen appliance specialists can provide additional guidance on common refrigerator issues and when professional help is warranted.