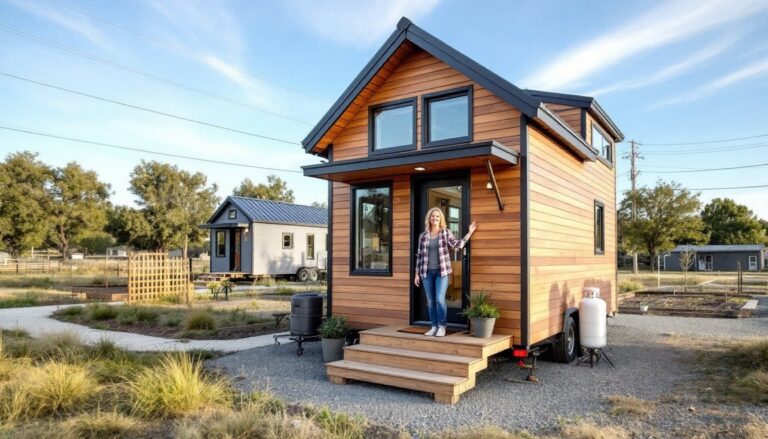
Houston’s property crime rates and package theft incidents have driven a surge in residential security upgrades. Whether you’re protecting your home in Memorial, monitoring deliveries in The Heights, or keeping tabs on your Katy driveway, installing security cameras has become a practical necessity rather than a luxury. This guide walks through everything homeowners need to know, from choosing weather-resistant equipment that can handle Houston’s humidity and storms to running cables through attic spaces without roasting alive. You’ll learn when a DIY install makes sense, when to call a professional, and how to navigate permits and HOA restrictions specific to Harris County.
Table of Contents
ToggleKey Takeaways
- Security camera installation in Houston is driven by rising property crime rates and package theft, with studies showing homes without systems are 2.5 times more likely to be targeted.
- Choose between PoE (wired), Wi-Fi, or hybrid camera systems based on your home’s layout, network coverage, and budget—PoE provides the best performance for permanent installations.
- Houston’s extreme heat, humidity, and storms demand outdoor cameras with IP65/IP66 ratings and operating ranges of -4°F to 122°F or wider to prevent failure during summer months.
- DIY installation of a 2-4 camera PoE system is achievable over a weekend with proper planning, but complex setups, limited attic access, or 8+ cameras warrant hiring a professional installer for $150-$300 per camera.
- Houston doesn’t require permits for low-voltage camera wiring in homes, but check your HOA rules for visibility and placement restrictions before purchasing equipment.
- Insurance discounts of 5-20% on homeowners premiums often offset security camera installation costs within a few years while providing real-time alerts and documented evidence.
Why Houston Homeowners Are Investing in Security Cameras
Houston’s property crime statistics remain a driving factor. According to HPD data, residential burglaries and vehicle break-ins spike during summer months when many families vacation, and package theft continues year-round across all ZIP codes. Visible cameras serve as proven deterrents, studies show homes without security systems are 2.5 times more likely to be targeted.
Beyond crime prevention, Houston homeowners use cameras to monitor contractors during renovations, check on elderly family members, and keep an eye on pool areas when kids are home. The widespread availability of affordable Wi-Fi cameras with smartphone access has made remote monitoring accessible to most budgets. Insurance companies often provide discounts, typically 5-20% off homeowners premiums, for documented security systems, which can offset installation costs within a few years.
Houston’s sprawling layout means response times vary widely by neighborhood. A camera system provides evidence if something does happen and gives homeowners real-time alerts, whether they’re stuck in traffic on I-10 or at work downtown. The technology has matured: night vision, motion detection zones, and cloud storage are now standard features rather than premium add-ons.
Choosing the Right Security Camera System for Your Houston Home
Houston security camera systems fall into three main categories: wired (PoE), wireless (Wi-Fi), and hybrid systems. Each has trade-offs.
Power over Ethernet (PoE) cameras run a single Cat5e or Cat6 cable to each camera, providing both power and data. They’re reliable, don’t depend on Wi-Fi signal strength, and work well for multi-camera setups. The downside: running cable through walls or attic spaces takes time and some carpentry skill. If your home has an unfinished attic or accessible crawl space, PoE is often the cleanest long-term solution.
Wi-Fi cameras install quickly, mount the camera, plug in power (or use battery models), and connect via your home network. They’re ideal for renters or single-camera installs. But Houston’s larger homes often have Wi-Fi dead zones, especially in garages or back fences. You’ll need strong mesh network coverage or a dedicated outdoor access point. Battery-powered models require recharging every 2-6 months depending on activity.
Hybrid systems combine wired base stations with wireless cameras. Brands like Arlo and Ring offer this setup, balancing ease of install with stable connectivity. If you’re covering front porch, driveway, and backyard, a hybrid approach often makes the most sense.
Resolution matters. 1080p is the minimum for useful detail: 4K cameras capture license plates and facial features at greater distances but require more storage and bandwidth. For typical suburban lot coverage, 2K (2560×1440) hits the sweet spot for clarity without overwhelming your network.
Indoor vs. Outdoor Cameras: What Houston’s Climate Demands
Houston’s climate is brutal on outdoor electronics. Summer temperatures regularly exceed 95°F, humidity hovers near 90%, and sudden thunderstorms dump inches of rain in minutes. Any outdoor camera must carry an IP65 or IP66 rating at minimum, this means dust-tight and protected against water jets from any direction.
Look for cameras with operating temperature ranges of -4°F to 122°F or wider. Cheaper models rated only to 104°F will fail during July and August. Metal housings dissipate heat better than plastic. Mounting cameras under eave overhangs provides shade and rain protection, extending lifespan significantly.
Houston security camera installation for outdoor units should account for hurricane season. Secure cameras to structural framing, not just siding or fascia. Use stainless steel hardware, galvanized steel will corrode in the humidity. If mounting to brick (common in Houston homes built before 2000), use tapcon concrete anchors rather than plastic expansion anchors.
Indoor cameras face fewer environmental challenges but need placement that covers entry points without invading privacy in bedrooms or bathrooms. Hardwired indoor models can tap into existing doorbell wiring if you’re upgrading from a traditional chime. Many Houston homes have a 16V AC transformer for doorbells that can power a video doorbell with minimal electrical work.
DIY Security Camera Installation: Step-by-Step Guide
Most homeowners can install a basic 2-4 camera system over a weekend. Here’s the process for a PoE wired system, which provides the best performance for permanent installations.
Tools and Materials:
- Cameras and NVR (network video recorder)
- Cat6 cable (buy 500-1000 ft bulk box)
- RJ45 connectors and crimping tool, or pre-terminated cables
- Drill with 1/2-inch and 3/4-inch spade bits
- Fish tape or pull rods
- Voltage tester
- Ladder rated for your height needs
- Stud finder
- Exterior caulk (paintable silicone)
- Cable staples
- Safety glasses, dust mask, gloves
Step 1: Plan Camera Placement
Walk your property and mark camera locations. Common spots: above front door at 8-9 feet, garage side door, driveway view capturing street and mailbox, backyard covering patio and fence gates. Avoid aiming cameras directly at neighbors’ windows or yards, it creates tension and may violate local privacy expectations.
Check sight lines. Stand where you plan to mount each camera and verify the angle covers what you need. Trees and bushes grow: account for seasonal foliage.
Step 2: Run Cables from NVR to Camera Locations
Place your NVR near your router in a climate-controlled space, closet, utility room, or garage if it stays under 90°F. Single-story homes with attic access are straightforward: drill up through top plates into the attic, run cables across attic joists, then drill down to exterior mounting points.
Two-story homes get trickier. You may need to fish cables through wall cavities or use external conduit along eaves. If drilling through brick exterior, use a masonry bit and work slowly to avoid cracking. Drill at a slight downward angle from inside to outside so water doesn’t track back into the wall.
Leave 3-4 feet of extra cable at each camera location, you can always coil excess behind the mount. Labeling cables as you go (“Front Door,” “Driveway,” etc.) prevents confusion later.
Step 3: Mount Cameras
Most PoE cameras include a mounting plate. Hold it against the wall, level it, and mark screw holes. For vinyl or fiber cement siding, locate the stud behind (use a stud finder or tap until the sound changes). Drive screws into solid framing, not just sheathing. For brick or stucco, use appropriate masonry anchors.
Feed the cable through the camera’s mounting bracket before securing it. Connect the RJ45 plug, then attach the camera to the bracket. Many models have a three-axis adjustment, tighten this once you’ve confirmed the camera view on your monitor.
Seal all penetrations with exterior-grade caulk to prevent water infiltration and insect entry. Houston’s mosquitoes and palmetto bugs will find any gap.
Step 4: Connect to NVR and Configure
Plug all camera cables into the PoE switch or NVR’s built-in PoE ports. Connect the NVR to your router via Ethernet. Power everything on. Most systems auto-detect cameras within 30-60 seconds.
Access the NVR via its local IP address (check the manual or use the manufacturer’s app). Set recording schedules, continuous recording eats storage fast. Motion-triggered recording with a 10-second pre-buffer captures events without filling terabytes of footage of your empty driveway. Configure detection zones to ignore tree branches and passing cars if your camera faces the street.
Change default passwords immediately. Use a unique, strong password and enable two-factor authentication if available. Unsecured cameras become targets for botnets, which scan for default credentials.
Step 5: Test and Adjust
Walk your property after dark to check night vision coverage. Adjust motion sensitivity, Houston’s outdoor cats, possums, and raccoons will trigger cameras constantly if sensitivity is too high. Most systems let you create activity zones, ignoring motion in areas like the street or neighboring yards.
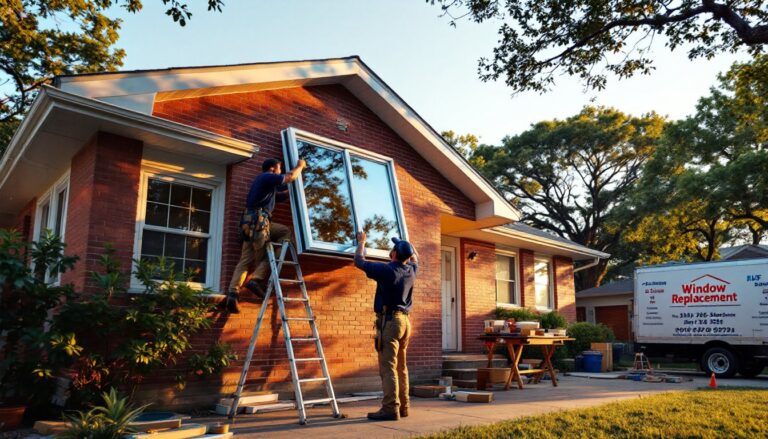
Professional installers offering Houston security camera installation typically complete this process in 4-6 hours for a four-camera system, but DIYers should budget a full weekend for the first install. The learning curve flattens quickly, adding cameras later takes a fraction of the initial time.
When to Hire a Professional Installer in Houston
Some installations exceed reasonable DIY scope. Call a professional if:
Your home has no attic access or a sealed cathedral ceiling. Running cables through finished walls without access points requires cutting drywall and patching, pros have tools like flexible drill bits and inspection cameras that minimize damage.
You’re installing 8+ cameras. Managing that many cable runs, configuring advanced NVR settings, and integrating with existing alarm systems or smart home platforms benefits from experience. Commercial-grade systems with redundant storage and off-site backup typically require professional setup.
Electrical work is needed. If you want cameras powered by dedicated circuits rather than PoE or plug-in adapters, that’s licensed electrician territory in Houston. The National Electrical Code (NEC) requires permits for new circuits, and Harris County inspectors check that work.
You lack the tools or time. Quality crimping tools, fish tapes, and tall ladders add up. If you’re only installing one system, renting or buying tools may cost more than hiring out. Houston has numerous reputable installation companies: expect to pay $150-$300 per camera for professional installation, including equipment and labor. That’s a fair price for a clean install with warranty.
Complex networking is required. Integrating cameras with VLANs, setting up remote viewing through business-grade firewalls, or configuring RTSP streams for custom monitoring setups moves beyond basic DIY. Many smart home installers offer camera integration as part of broader automation projects.
Professional installers also handle permit applications and HOA approval processes, which saves homeowners administrative headaches. If your HOA requires architectural review for exterior changes, paying a pro who’s worked in your neighborhood before often speeds approval.
Houston Permits, HOA Rules, and Legal Considerations
Houston doesn’t require permits for low-voltage security camera wiring in single-family homes, but any new electrical circuits do. If you’re adding a dedicated 120V outlet for an NVR or running conduit that penetrates exterior walls, check with the city’s permitting department. Most PoE and plug-in systems avoid this entirely.
HOA rules vary widely. Some associations restrict camera visibility from the street, require specific colors or mounting styles, or prohibit recording common areas like pools and clubhouses. Review your HOA’s architectural guidelines before buying equipment. Submitting a site plan showing camera locations and fields of view often satisfies review committees. Most HOAs approve doorbell cameras without issue, but pole-mounted or highly visible cameras may require formal approval.
Texas is a one-party consent state for audio recording, meaning you can record conversations you’re part of. But security cameras that record audio in areas where others have a reasonable expectation of privacy (inside a neighbor’s yard, for example) can create legal issues. Most installers recommend disabling audio recording or using cameras without microphones to avoid complications.
Never point cameras at neighboring properties beyond incidental coverage of shared property lines. Courts have upheld harassment claims when cameras deliberately monitor neighbors’ windows, pools, or private outdoor spaces. Angle cameras to cover your property, and use privacy masking features to black out areas beyond your lot line.
For rental properties, landlords must notify tenants if cameras monitor common areas like hallways or parking. Recording inside rental units without disclosure violates Texas privacy laws. If you’re renting and want to install cameras, get written permission from your landlord, most lease agreements prohibit modifications without approval, and drilling through exterior walls typically qualifies.
Local ordinances in some Houston suburbs (particularly in Fort Bend and Montgomery counties) have specific fencing and structure rules that affect camera pole mounts or standalone camera posts. A quick call to your city’s planning department clarifies what’s allowed. Avoid assumptions: a $50 permit is cheaper than removing a non-compliant installation.
Neighborhood crime watch groups and community safety technology integrations are growing across Houston. Some subdivisions coordinate camera coverage to eliminate blind spots, sharing access with trusted neighbors or local law enforcement through programs like HPD’s Camera Registration. This voluntary program doesn’t give police live access but helps them identify nearby cameras when investigating incidents.
Conclusion
Security camera installation in Houston balances technical know-how, climate considerations, and local regulations. Most homeowners can handle a basic wired or wireless system with careful planning and a weekend’s effort. Prioritize weather-resistant equipment, proper cable management, and thoughtful camera placement that respects privacy while covering key areas. For complex installs or when time and tools are limiting factors, professional installation delivers peace of mind and often comes with service warranties that DIY setups don’t. Either way, a well-designed camera system protects property, deters crime, and provides valuable documentation when you need it most.