If your shower doors are coated with white film, your soap won’t lather, or your morning coffee tastes off, your home’s water quality is probably the culprit. Hard water and contaminants affect more than just taste, they damage appliances, shorten the life of your water heater, and leave residue on everything they touch. A water softener and a water filter tackle different problems, and in many cases, homeowners need both to fully address their water issues. This guide breaks down how each system works, when you need one or both, and what to know before you buy or install.
Table of Contents
ToggleKey Takeaways
- A water softener and filter serve different purposes: softeners remove hardness minerals to protect plumbing and appliances, while filters remove contaminants like chlorine and lead to improve water safety and taste.
- Water softeners use ion exchange to swap calcium and magnesium for sodium or potassium ions and require regular salt refills, periodic resin cleaning, and drain connections to function properly.
- Most homeowners benefit from installing both a water softener and water filter in sequence, with the softener upstream, to fully address hard water and contaminant issues while extending filter life.
- Test your water first to determine hardness (gpg) and contaminant levels; if hardness exceeds 10 grains per gallon, a softener is essential to protect appliances and reduce scale buildup.
- Water filter cartridges need regular replacement—sediment filters every 3–6 months, carbon filters every 6–12 months, and RO membranes every 2–3 years—to maintain effectiveness and prevent contaminant breakthrough.
- Professional installation is recommended for main water line work unless you’re confident with plumbing, as it ensures code compliance, proper venting, and correct system sizing while costs typically range from $300–$800 in labor.
What’s the Difference Between a Water Softener and a Water Filter?
A water softener removes hardness minerals, primarily calcium and magnesium, that cause scale buildup in pipes, water heaters, and fixtures. It does not purify water or remove contaminants like chlorine, lead, or sediment. Softeners work through a process called ion exchange, swapping hardness minerals for sodium or potassium ions.
A water filter, on the other hand, removes impurities: sediment, chlorine, heavy metals, pesticides, and sometimes bacteria or viruses, depending on the filter type. Filters improve taste, odor, and safety but don’t address hardness. They use mechanical filtration, activated carbon, reverse osmosis, or UV light, depending on what you’re targeting.
Think of it this way: a softener protects your plumbing and appliances: a filter protects your health and improves water quality at the tap. Neither does the job of the other, which is why many homes benefit from installing both in sequence, softener first, then filter, so the filter media doesn’t get clogged with scale.
Why Your Home Might Need Both a Softener and a Filter
How Water Softeners Work
Water softeners use a resin tank filled with tiny polymer beads coated in sodium or potassium ions. As hard water flows through, calcium and magnesium ions stick to the resin, and sodium ions release into the water. Over time, the resin becomes saturated with hardness minerals and needs regeneration, a process where a concentrated brine solution (saltwater) flushes the resin, washing the hardness minerals down the drain and recharging the beads with fresh sodium.
Most residential softeners are demand-initiated, meaning they regenerate based on water usage rather than a fixed schedule. Look for systems rated by grains of hardness removed, common residential units handle 30,000 to 80,000 grains between regenerations. Your water’s hardness (measured in grains per gallon, or gpg) and household size determine the capacity you need.
Softeners require a drain line, access to electricity (for the timer and valve), and a supply of salt or potassium chloride pellets. Potassium chloride costs more but is a better choice for homeowners on sodium-restricted diets or using septic systems.
How Water Filters Work
Water filters come in several configurations, each targeting different contaminants:
- Sediment filters use pleated or wound cartridges (typically 5 to 20 microns) to catch sand, silt, and rust. These are often the first stage in a multi-stage system.
- Activated carbon filters remove chlorine, volatile organic compounds (VOCs), and improve taste and odor. Carbon block filters outperform granulated carbon for contaminant contact time.
- Reverse osmosis (RO) systems force water through a semipermeable membrane, removing up to 99% of dissolved solids, including lead, arsenic, nitrates, and fluoride. RO systems waste 3 to 4 gallons per gallon produced and require a storage tank and drain connection.
- UV filters kill bacteria and viruses with ultraviolet light but don’t remove particles or chemicals. They’re often paired with sediment and carbon pre-filters.
Whole-house filters install at the main water line and treat all water entering the home. Point-of-use filters (under-sink, countertop, or faucet-mounted) treat water at a single tap. If you’re dealing with hard water stains throughout the house, a whole-house softener is the right move: if chlorine taste is the main issue, a carbon filter at the kitchen sink might be enough.
Choosing the Right System for Your Home
Start by testing your water. You can buy a basic hardness test kit at a hardware store or order a lab analysis through your county extension office or a private lab. The report will show hardness (gpg), pH, iron, chlorine, nitrates, and other contaminants. Some municipal water suppliers publish annual water quality reports online, but those don’t reflect what’s picked up in your home’s plumbing.
If hardness is above 7 gpg, a softener is worth considering. Above 10 gpg, it’s nearly essential to protect appliances. If you see elevated lead, chlorine, or other contaminants, filter accordingly.
For sizing a softener, multiply your household’s daily water usage (typically 80–100 gallons per person) by the water’s hardness in gpg. A family of four with 12 gpg hardness uses roughly 400 gallons/day × 12 gpg = 4,800 grains/day. A 32,000-grain softener would regenerate every 6–7 days. Oversizing slightly reduces regeneration frequency and salt use.
When pairing a softener with a filter, install the softener upstream so the filter doesn’t have to handle scale buildup. If you’re using RO, the softener will extend membrane life significantly. Whole-house carbon filters are often installed before the softener to remove chlorine, which can damage softener resin over time.
Budget for both upfront and ongoing costs. A quality whole-house softener runs $800–$2,500 installed, depending on capacity and features. Whole-house carbon or sediment filters range from $300–$1,200. RO systems for under-sink use cost $200–$600 for DIY models, more for professional installation. Replacement filters and salt are recurring expenses, plan on $50–$150/year for salt and $50–$300/year for filter cartridges, depending on usage and system type.
Installation Options: DIY vs. Professional Setup
DIY installation is feasible for homeowners comfortable with basic plumbing and following manufacturer instructions. Most softeners and whole-house filters require:
- Cutting into the main water line (after the meter and pressure regulator, before any branch lines)
- Installing a bypass valve so you can isolate the system for service
- Running a drain line (softeners and RO systems produce wastewater)
- Providing electrical supply (softeners need 110V for the control head: some filters use battery-powered monitors)
You’ll need a pipe cutter or reciprocating saw, adjustable wrenches, Teflon tape or pipe dope, and possibly SharkBite fittings or soldering equipment if working with copper. PEX and CPVC are easier to work with for most DIYers.
Before cutting into your water main, shut off the water at the meter or main shutoff, open faucets to drain the line, and have towels and a bucket ready. Many municipalities require a backflow preventer on the main line: check local codes before starting.
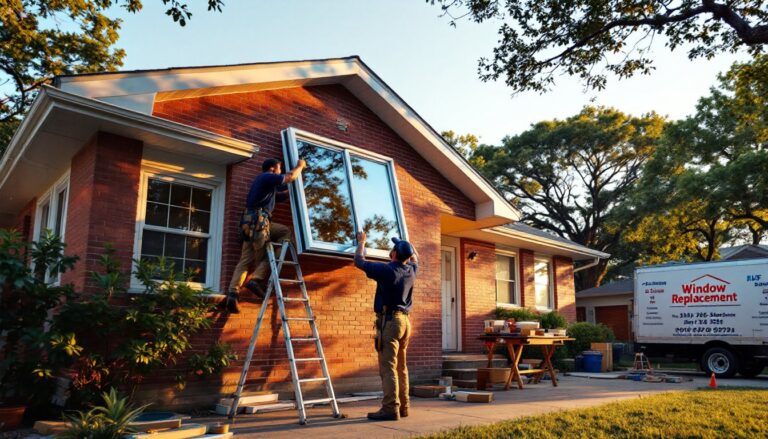
Professional installation is the safer bet if you’re not confident sweating copper, if your main line is in a tight crawl space, or if local codes require a licensed plumber for work on the main supply. Costs typically run $300–$800 for labor, depending on complexity and regional rates. Hiring a pro also ensures proper venting for drain lines (which must comply with plumbing codes) and correct sizing of bypass valves.
Some jurisdictions require a plumbing permit for work on the main water supply. Check with your local building department. If a permit is required and you skip it, you could face fines or issues when selling the home. Many professional installers pull permits as part of their service.
For under-sink RO systems or point-of-use carbon filters, DIY is straightforward, most use push-fit connectors and require only a ½” cold water line, a drain connection, and sometimes a hole drilled in the countertop or sink deck for the dedicated faucet. A hole saw (typically 1¼”) and drill are the main tools needed.
Maintenance and Long-Term Care
Water softeners need salt refills every 4–8 weeks, depending on usage and tank size. Use high-purity salt pellets (not rock salt, which leaves residue) and keep the brine tank at least ¼ full. Every 6–12 months, check the brine tank for salt bridging (a hard crust that prevents proper regeneration) and clean out any sediment at the bottom.
Once a year, pour a resin cleaner (iron remover or all-purpose softener cleaner) into the brine well to flush out iron buildup and extend resin life. If your water has high iron content (above 0.3 ppm), consider an iron filter before the softener or use a cleaner more frequently. Resin beads typically last 10–15 years before needing replacement.
For filters, replace cartridges on schedule, sediment filters every 3–6 months, carbon filters every 6–12 months, and RO membranes every 2–3 years. Delaying replacements reduces effectiveness and can allow contaminants to pass through. Some systems have built-in flow meters or timers: others require manual tracking. Mark replacement dates on a calendar or set phone reminders.
Check O-rings and seals during cartridge changes and replace if cracked or worn. A small tube of food-grade silicone grease keeps O-rings pliable and prevents leaks. Also inspect drain lines for clogs or kinks, softener backwash can carry sediment that accumulates in drain tubing over time.
If water pressure drops noticeably, the filter may be clogged, or the softener’s resin bed may need cleaning. Whole-house systems should include a pressure gauge on both inlet and outlet sides to help diagnose flow restrictions.
Many home maintenance checklists recommend annual inspections of water treatment systems. If you’re uncertain about any part of the process or suspect a malfunction, contact the manufacturer’s support line or a licensed plumber. Ignoring maintenance can lead to water damage, appliance failure, or compromised water quality, none of which are cheap fixes. And if you’re planning other major home projects or need to budget for professional help, cost estimators from resources like HomeAdvisor can help you plan accurately.
Safety reminder: When working with brine or backwash discharge, wear nitrile gloves and avoid contact with eyes. Salt and concentrated minerals can irritate skin and mucous membranes. If servicing UV systems, never look directly at the UV bulb when it’s powered on.